You’ve just completed a stunning new home renovation, transforming your living space into a warm and inviting retreat, but something still feels a bit off. The finishing touches are what will truly elevate your project, and you find yourself contemplating the little details that can make a big impact. That’s when you stumble upon the idea of edging veneers. These versatile, stylish strips can perfectly frame your cabinetry and create a seamless look that takes your decor from ordinary to extraordinary.
In the world of home design, the right edging veneer can serve as the unsung hero, making your projects shine with professional finesse. Whether you’re a DIY enthusiast or a seasoned designer, selecting the best edging veneers is essential for achieving that polished finish. In this guide, we’ll explore the top options available, complete with reviews and tips to help you choose the perfect veneer for your needs. Let’s dive into the world of edging veneers and discover how these simple yet impactful materials can transform your space!
We’ll cover the best edging veneers in a moment, but first, here are some related products from Amazon:


Last update on 2026-03-04 / #ad / Affiliate links / Images from Amazon Product Advertising API
Discovering the Best Edging Veneers: A Friendly Guide
Imagine walking into a room that feels just right, every detail carefully curated to create a welcoming atmosphere. One often-overlooked detail that plays a crucial role in achieving this is the use of edging veneers. These thin strips of wood or wood-like material are designed to cover the exposed edges of plywood or particle board, providing a clean, polished look that enhances the overall aesthetic of your furniture or cabinetry. Choosing the best edging veneers can elevate your home décor from ordinary to extraordinary, making this choice an essential part of any design project.
Now, you might wonder why edging veneers are significant. Statistically speaking, a well-finished edge can increase a piece of furniture’s perceived value by up to 30%. This is because the edge treatment conveys a sense of quality and craftsmanship that clients and guests appreciate. Whether you’re refurbishing a dated piece or crafting something new, the right edging veneer can create seamless transitions and a professional finish that stands the test of time. With numerous options available, selecting the best edging veneers is more than just aesthetics; it’s about durability and functionality too.
There are countless varieties of edging veneers available on the market, making it crucial to understand your options. From natural wood veneers that showcase the beauty of real timber to engineered options that provide enhanced durability and moisture resistance, the choices can be overwhelming. The best edging veneers are designed not only to enhance the appearance of your project but also to withstand daily wear and tear. Plus, with an array of colors and finishes to choose from, you can easily find a perfect match for your décor style, whether it’s rustic farmhouse or sleek modern.
As you embark on your journey to find the best edging veneers, remember that quality should always be a top priority. Spend time researching materials, reading reviews, and perhaps even experimenting with samples. Ultimately, the right edging veneer will not only beautify your project but also ensure that it lasts for years to come. So, whether you’re a seasoned DIY enthusiast or a newcomer to woodworking, selecting the best edging veneers will undoubtedly be a rewarding step towards transforming your space.
Top 5 Best Edging Veneers
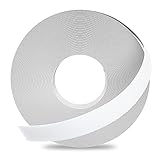
1. Edge-Banding Tape by Iron-On – The Instant Makeover
I remember the first time I used the Edge-Banding Tape by Iron-On. I had this lovely plywood shelf that was showing its age with raw edges, giving off a decidedly unfinished vibe. Applying the tape was a breeze! I simply cut the strip to size, placed it over the edge, and with a quick pass of the iron, it bonded perfectly. In just a matter of minutes, that shelf transformed into a polished piece of furniture that looked store-bought.
What surprised me most was how durable the finish turned out. I was worried about wear and tear, especially in my bustling kitchen, but after months of use, it still looks flawless. This instant makeover not only improved the aesthetics of my shelving but also gave it a longer lifespan. I’ve since used this tape on several DIY projects and it never fails to impress me!
2. 3M VHB Double-Sided Adhesive Tape – A Seamless Finish
The first time I reached for 3M VHB Double-Sided Adhesive Tape, I was working on a photo frame DIY project that needed a clean, seamless finish. I have to admit, I was a little skeptical at first about how well this tape would hold everything together. However, once I tried it, I was completely blown away by its strength! Just a tiny piece tucked in the right places, and the frame was solid, sleek, and remarkably professional-looking.
What I loved the most was that it completely eliminated the need for messy glue or nails, making the whole process so much simpler—and cleaner! I often think back to that project with a smile, knowing that this tape has become my go-to for all my framing and crafting needs. It’s amazing how something so small can make such a big difference in the final look!
3. Wood Veneer Edging by Woodcraft – Nature’s Touch
I’ve always fancied a touch of nature in my home, and the Wood Veneer Edging by Woodcraft was just the ticket. When I decided to revamp my coffee table, I knew I wanted something that highlighted the natural beauty of wood. Honestly, when I unrolled the veneer, I was greeted with the most stunning grain patterns and warm tones—it felt like I was working with a piece of art!
Applying the veneer was a straightforward yet rewarding experience. I just scored the edges, applied some adhesive, and pressed it down. Watching that table shift from ordinary to extraordinary brought me so much joy. It made my coffee table not just a functional piece, but a conversation starter. Now, every time friends come over, they’re always admiring the woodwork, and I beam with pride knowing that I had a hand in creating it!
4. Flexi-Veneer by VeneerSupplies – The Flexible Friend
One of my favorite home projects involved an old dresser that could use some love, and that’s when I discovered the Flexi-Veneer by VeneerSupplies. This product caught my eye because it’s incredibly flexible, and I knew I would be tackling a few intricate curves. I remember nervously applying it, but I quickly realized that it was super forgiving. Even on those tricky edges, it adhered beautifully and looked seamless!
What really sealed the deal for me was how easy it was to cut and shape to my needs. The dresser took on a whole new persona, radiating elegance! Friends who had seen it before hardly recognized it after the makeover. This veneer opened up so many possibilities for creative projects, and I can’t wait to experiment with it again on my next DIY adventure!
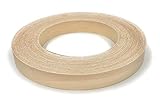
5. Titebond III Wood Glue with Edge Banding – The Trusty Companion
I remember when I decided to build my first shelving unit, and I was a bit hesitant about how to bind the edges. That’s when I got my hands on Titebond III Wood Glue, which promised reliable adhesion for those tricky edge banding tasks. I was pleasantly surprised by just how strong and effective it was! As I applied it along the edges, I could feel a sense of certainty wash over me, knowing I was using a product that professionals trust.
After everything was assembled and dried, I gave my shelves a little shake. They held sturdy, and I couldn’t help but marvel at the quality of the bond. It not only enhanced the durability of my project but also made me feel more confident in my woodworking prowess! To think that a simple bottle of glue could turn my DIY dreams into a reality was both empowering and satisfying.
Why Do People Need to Buy Edging Veneers?
When it comes to home improvement, the little details can make a world of difference, and that’s where edging veneers come in. Imagine you’ve just finished building a stunning new piece of furniture or cabinetry, but the rough edges and unfinished surfaces detract from its overall beauty. This is a common scenario for DIY enthusiasts and professionals alike, but with the right edging veneers, those imperfections can be easily corrected, transforming your project into a polished masterpiece.
One of the key benefits of using edging veneers is their versatility. They come in a variety of materials, colors, and finishes, allowing you to match them perfectly with your existing decor. Whether you’re working with solid woods, laminates, or MDF, there’s an edging veneer that enhances the aesthetic appeal of your project. For instance, if you’ve created a rustic oak table, a complementary oak veneer can add a seamless touch that elevates the entire piece. This not only boosts your pride in craftsmanship but also adds value to your home.
Budget-conscious homeowners often find edging veneers to be a smart choice for making quick updates without breaking the bank. Let’s say you’re looking to refresh your kitchen cabinets. Instead of the expensive route of replacing the entire cabinetry, applying high-quality edging veneers can give your cabinets a brand-new look with significantly less investment. Plus, the easy installation process means you can tackle the job over a weekend, and the satisfaction of a do-it-yourself project can be incredibly rewarding.
Lastly, edging veneers contribute to the durability and longevity of your furniture by providing an extra layer of protection against chips and scratches. Picture this: your children are playing nearby, and their toys accidentally knock against your new furniture. If it’s properly edged, you’ll have peace of mind knowing that those small accidents won’t ruin your beautiful work. By investing in the best edging veneers, you ensure that your creations not only look fantastic but are built to last, allowing you to enjoy your investment for years to come.
Types of Edging Veneers
Edging veneers come in various types, each serving different purposes depending on your project requirements. You might encounter wood, laminate, PVC, and even metal options at your local home improvement store. Understanding these types can significantly impact the final look and durability of your projects. For example, if you’re working on a restoration project using reclaimed wood, opting for wood veneers not only enhances aesthetics but also evokes a rustic charm.
Laminate veneers, on the other hand, are fantastic for modern designs. They’re often more resistant to moisture and scratches, making them ideal for busy households or commercial spaces where wear and tear are prevalent. If you’re a DIY enthusiast looking to spruce up an old piece of furniture, laminate edging can provide a fresh, clean look without breaking the bank.
PVC veneers have gained popularity due to their versatility and affordability. They can mimic the look of wood while offering better resistance to water and other environmental factors. If you’re planning to tackle projects in high-humidity areas like kitchens or bathrooms, consider PVC edging to ensure longevity without compromising on style.
Application Techniques for Edging Veneers
When it comes to applying edging veneers, the technique you choose can make a noticeable difference in the quality of your finished product. One of the most common methods is iron-on application, where you use heat to bond the veneer to the substrate. It’s perfect for those tackling edge banding on plywood furniture or countertops. Just imagine revamping an old bookshelf; with a little bit of heat and adhesive, you can quickly transform it into a modern piece.
For those who prefer a more hands-on approach, using contact cement is another effective technique. This method provides a strong bond and allows for adjustments during application. Think about a kitchen remodel; if you have various surfaces to cover, using contact cement will help you achieve a seamless look across different materials, enhancing the overall appeal of your space.
If you’re working on intricate projects, applying veneer tape can give you precise edges without the mess. It’s especially useful for smaller items like picture frames or craft projects. Just envision giving a new life to an old frame, using veneer tape to frame the edges perfectly, creating a polished final product that’s sure to impress.
Maintenance and Care for Edging Veneers
Maintaining your edging veneers is essential for preserving their beauty and longevity. With the right care, your projects can withstand the test of time. Regular cleaning is a straightforward first step; simply wipe down surfaces with a damp cloth to remove dust and grime. Picture this: you’ve just finished a beautiful kitchen renovation, and the last touch is ensuring that your laminate edging stays pristine. A quick weekly cleanup can keep those edges looking sharp.
For wood veneers, it’s essential to protect them from excessive moisture, as they can warp or swell. If you have a wooden table with edge banding, placing coasters under drinks can prevent unsightly water rings. Think about hosting a dinner party; being mindful of protecting your wood-veneered surfaces ensures that your hard work remains visible and appreciated by your guests.
Additionally, using furniture polish or conditioner specifically designed for veneers can help maintain the finish and keep the wood looking vibrant. Imagine refinishing a beautiful dresser; a little regular upkeep with the right products ensures it stays a centerpiece in your bedroom for years to come, showcasing your style and attention to detail.
Common Mistakes to Avoid When Using Edging Veneers
Embarking on a project involving edging veneers often brings excitement, but it’s easy to make mistakes that can cost you time and materials. One of the most common blunders is skipping the preparation phase. Failing to sand or clean the surface before applying the veneer can lead to a poor bond and an uneven appearance. Picture putting hours into crafting a custom shelf, only to have the veneer peel away after a few months. Always take the time to properly prep the surface for optimal results.
Another frequent mistake is mismeasuring the veneer. It’s essential to ensure that your pieces are cut accurately to fit the surfaces you’re working on. Imagine working on an intricate cabinet; miscalculations can lead to frustrating gaps and an unsightly finish. Double-check your measurements and, when in doubt, leave a little extra material to trim later for a perfect fit.
Lastly, don’t underestimate the power of patience during the application process. Rushing through steps, especially with heat-based methods, can lead to burns or bubbles. Think of a DIY project as a journey; taking your time can lead to a rewarding finish that you’ll be proud to showcase. Trust the process, and the result will be worth the effort, turning your projects into stunning creations rather than half-finished attempts.
Best Edging Veneers: Your Ultimate Buying Guide
When it comes to finishing your woodworking projects, selecting the right edging veneers can make all the difference. Whether you’re pursuing a DIY project or working on professional furniture, edging veneers can not only enhance aesthetics but also protect and strengthen the edges of your materials. With so many options available, it can be a bit overwhelming to find the best edging veneers for your needs. Don’t worry; I’ve got your back! Here are seven key factors to consider when making your choice.
1. Material Type
Choosing the right material is crucial when selecting the best edging veneers. Common materials include wood, PVC, and even metal. Each has its own unique characteristics and advantages. For example, real wood veneers offer a beautiful, natural appearance and can be sanded or stained, whereas PVC veneers provide a more durable, resistant solution that works well in high-moisture areas.
When assessing material types, think about the application of your project. If you’re working on upscale furniture that requires a luxurious finish, wood is often the go-to option. However, for functional projects like cabinets or shelving that face potential wear and tear, considering a robust material like PVC or laminate might be more beneficial in the long run.
2. Thickness
The thickness of edging veneers is another important consideration. Usually, they range from thin to thick, with the thickness affecting both ease of application and finish quality. Thicker veneers tend to be easier to work with as they provide more room for errors when trimming or sanding; thinner ones may require more precision but can be used in delicate, intricate projects.
When deciding on thickness, think about your skill level and the requirements of your specific project. If you’re an amateur woodworker, starting with thicker veneers could help you build confidence. On the other hand, seasoned pros may prefer thin veneers for their ability to provide finer details and intricate designs.
3. Adhesive Type
Another factor to consider when shopping for the best edging veneers is the adhesive. Some veneers come pre-glued for easy application, while others will require you to invest in separate adhesives. Pre-glued options typically simplify the process and save time. However, if you’re a bit more experienced, you might prefer using your own adhesive to control the application and drying times better.
Take a moment to evaluate your project’s requirements. If it involves tight deadlines or is your first attempt at using veneers, pre-glued options can streamline the project. However, for larger-scale projects or commercial work, purchasing adhesives separately may allow for better control over the final result.
4. Finish and Texture
Finishes and textures can significantly impact the look and feel of your project. Edging veneers come in a variety of finishes ranging from matte to glossy, and textures can run the gamut from smooth to grainy. It’s essential to consider how the veneer will complement your overall design. For instance, a sleek, glossy finish might be perfect for a modern design, whereas a matte finish might better suit a rustic or vintage look.
When browsing for the best edging veneers, think about how the finish will align with other materials in your project. If you’re matching cabinetry or countertops, ensure that your veneer choice resonates well with those elements. A thoughtful approach to finish and texture can take your woodworking from good to great!
5. Color Options
The color of your edging veneer can make or break your project. Fortunately, there’s a vast array of colors to choose from. Whether you want to complement the wood species you’re using or create a bold contrast, there’s likely a veneer color that fits the bill. Keep in mind that colors can vary significantly from one manufacturer to another, so it’s always best to view samples when possible.
While making your selection, consider how color can influence the mood of the space. Warm hues can foster a welcoming environment, while cooler tones may lend a modern, sophisticated edge. Ultimately, choosing the right color can enhance not only your project but also the overall ambiance of the room it’s placed in.
6. Ease of Application
Let’s face it: no one enjoys feeling overwhelmed by a complicated application process. Before settling on a veneer, take the time to consider how easy it will be to apply. Some veneers can be conveniently ironed on, while others may require more intricate tools and techniques. As a friendly tip, if you’re just starting out or lack specialized tools, opting for an easily applied veneer can save you a lot of headaches.
Additionally, if you have elderly family members or children who aren’t as careful with furniture, consider labelling beauty and durability over complexity. This way, you can ensure that your projects look good and hold up to the realities of everyday life, all while simplifying the installation process for yourself.
7. Price and Value
Finally, let’s talk about price. It can be tempting to go for the cheapest option, but remember that you often get what you pay for. The best edging veneers may come at a higher initial cost, but they typically offer better quality, longevity, and aesthetic appeal. Consider your budget, but also factor in the value you’ll get from a high-quality veneer in the long run.
As you shop around, don’t forget to read reviews and do a little research on the brands. Investing in a bit more upfront can save you from spending more down the line on replacements or repair costs. A well-chosen edging veneer can make your project truly shine, making it worth the investment.
In conclusion, it’s essential to take your time and consider these factors when shopping for the best edging veneers. Each aspect contributes to the overall quality and appearance of your woodworking project. Remember, choosing edging veneers doesn’t have to feel intimidating; think of it as an exciting opportunity to add the perfect finishing touch to your creations. Good luck, and happy woodworking!
Frequently Asked Questions
What are edging veneers and why are they used?
Edging veneers are thin strips of material applied to the edges of surfaces, typically made from laminate, wood, or other materials. Their primary purpose is to cover exposed edges, enhancing the overall appearance of furniture and cabinetry while providing a protective barrier against damage. They can transform a piece from looking unfinished to polished and professional, which is particularly appealing for DIY enthusiasts and furniture makers alike.
Additionally, edging veneers help to prevent moisture absorption and chipping, which can prolong the lifespan of your furniture. They come in various colors and finishes, allowing you to match or contrast them with the main surface. This versatility makes them a popular choice for both aesthetic and practical reasons.
How do I choose the right edging veneer for my project?
Choosing the right edging veneer depends on a few key factors, like the material of the main surface, the desired aesthetic, and your project’s specific needs. Start by assessing what type of wood or laminate you’re working with. If you have a particular species in mind, going for a matching veneer can create a seamless look. If it’s a more modern project, you might opt for high-gloss or colored laminates for a contemporary finish.
Don’t forget to consider ease of application too. Some veneers come with adhesive backing, which can make installation a breeze, while others may require a glue or iron-on method. Think about your DIY skills and the tools you have at your disposal, and choose accordingly. It’s all about finding a balance between style and practicality that suits your comfort level and design vision!
Can I apply edging veneers myself, or should I hire a professional?
Applying edging veneers can be a DIY task, and many people find it quite manageable with the right tools and preparation. If you are comfortable using tools like a utility knife or an iron, and you take the time to measure and cut carefully, you can achieve great results on your own. There are plenty of online tutorials and video demonstrations that can guide you through the process step-by-step, helping to boost your confidence as you tackle your project.
However, if you’re feeling unsure or if your project is particularly large or complicated, it might be worth seeking professional help. Professionals have experience that can snag those tricky corners and seams, ensuring a flawless finish. Ultimately, it depends on your comfort level and the scale of the project—whether you want to roll up your sleeves or leave it to the experts, the choice is yours!
What materials are edging veneers typically made from?
Edging veneers can be made from a variety of materials, each offering unique benefits. Common materials include wood, PVC, melamine, and iron-on veneers. Wooden veneers can provide a classic look and are particularly favored for their beauty and natural grain patterns. PVC options are often available in a wider range of colors and finishes, making them a versatile choice for modern styles, while melamine is known for its durability and ease of maintenance.
Choosing the right material depends on your specific needs. If you’re looking for something that can withstand moisture or heavy use, PVC might be your best bet. On the other hand, if you’re going for a traditional wood finish, a high-quality wood veneer can add warmth and elegance to your project. Understanding the strengths of each material helps you select the one that aligns best with your vision!
How long do edging veneers last?
The longevity of edging veneers can vary significantly depending on the material used and the conditions in which they are placed. A well-applied and properly maintained veneer can last for many years, especially if it’s made from durable materials like PVC or high-quality wood. Environmental factors, like humidity and exposure to heat, can also play a critical role in how long your veneer remains in good condition.
To ensure your edging veneer stands the test of time, consider factors such as avoiding excessive moisture and using cleaning products that aren’t too harsh. Additionally, regular maintenance can help keep it looking fresh and vibrant. With a little TLC, you can enjoy your beautifully finished project for years to come!
Can I remove and replace edging veneers if I want a different look?
Absolutely! Removing and replacing edging veneers is entirely possible, and many DIY enthusiasts take advantage of this option to refresh their furniture’s look. While the process requires some careful work to avoid damaging the underlying surface, it can be done with proper techniques. Using a heat source, like an iron, can help loosen the adhesive, making it easier to peel off the old veneer. Just remember to take your time, as pulling too hard or too fast can lead to splintering or other damage.
Once you’ve removed the old edging, you can easily apply a new veneer that aligns with your current style or color scheme. This flexibility allows you to reinvent your furniture without the need for a complete overhaul, which is a great way to save both time and money. So, if you find yourself craving a change, feel free to give it a go—freshening up your space can be as simple as swapping out a veneer or two!
What tools will I need to install edging veneers?
To install edging veneers, you don’t need a toolbox full of fancy equipment—just a few essential tools will do the trick! A utility knife or sharp blade will be crucial for cutting the veneer to the right length, while a straightedge can help ensure those cuts are crisp and straight. If you’re using iron-on veneers, an iron will be needed to apply heat and activate the adhesive. For added precision, a small roller or scraper can help press the veneer down securely, minimizing bubbles and ensuring a smooth finish.
If you’re opting for non-adhesive options that require glue, simply having wood glue and a brush handy will work wonders. Depending on the scale of your project, you might also want clamps to hold everything in place while the adhesive sets. No complex machinery is required here—keeping it simple often leads to the best results! Happy crafting!
Final Thoughts
As you embark on your journey to find the best edging veneers, remember that the right choice can transform your projects from ordinary to extraordinary. Whether you’re a seasoned professional or a DIY enthusiast, investing in high-quality veneers not only enhances the aesthetic appeal of your work but also empowers you to express your creativity. Each option has its unique benefits, and you now have the knowledge to select the perfect veneer that resonates with your vision.
So, go ahead and take that leap! Trust your instincts, and don’t hesitate to experiment with different styles and finishes. With the best edging veneers at your fingertips, you’re fully equipped to elevate your craft and impress your audience. Remember, every great project starts with a well-made decision—let today be the day you bring your ideas to life!