As a budding homebrewer, I vividly remember the excitement of my first batch of craft beer bubbling away in the fermenter. The process felt like a delicious alchemy, turning simple ingredients into something extraordinary. But as the brewing day came to an end and I looked around at the few old bottles I had scavenged from friends and family, I realized I needed to invest in some proper bottles. The search for the best beer brewing bottles under $20 began—a quest fueled by dreams of bottling my creation and sharing it with friends at our next gathering.
In this journey, I discovered that finding great brewing bottles doesn’t have to break the bank. With affordable options that boast quality and functionality, there’s no need to skimp on your homebrew experience. Whether you’re a seasoned brewer or just getting started, having the right bottles can make all the difference in preserving the flavor and carbonation of your brews. Join us as we dive into a selection of the best beer brewing bottles under $20, complete with reviews and a buying guide to help you choose the perfect vessels for your brewing adventures.
We’ll cover the best beer brewing bottles under $20 in a moment, but first, here are some related products from Amazon:


Last update on 2025-10-08 / #ad / Affiliate links / Images from Amazon Product Advertising API
Exploring the Best Beer Brewing Bottles Under $20
Imagine the aroma of freshly brewed beer wafting through your home, a promise of the delicious sips to come. For many hobbyists and craft brew enthusiasts, bottling their own beer is not just a step in the brewing process; it’s a rite of passage. Selecting the right bottles is crucial, influencing everything from carbonation to flavor preservation. Fortunately, you don’t need to break the bank to find quality options. In fact, there are some of the best beer brewing bottles under $20 that can take your brewing game to the next level.
When it comes to bottling beer, knowing what types of bottles suit your brewing style is vital. The most common choices are glass bottles, particularly the classic amber or green ones, which protect your brew from light and help maintain the quality of the ingredients. Did you know that over 80% of homebrewers prefer glass bottles for their ability to withstand high pressure during carbonation? This makes them a reliable choice for homebrewing success. Plus, many glass beer bottles are designed with a sturdy neck, making them easy to cap and label, giving your homebrew a professional touch.
Now, if you’re new to brewing or simply looking for budget-friendly options, the market offers a plethora of choices that won’t dent your wallet. Several reputable brands produce high-quality bottles that can be found for under $20. For instance, 12-ounce bottles often come in packs of 24 or more, providing excellent value per bottle. You can also find handy kits that include caps and a capping tool, streamlining your brewing process and ensuring consistent results. Investing in these economical options allows you to focus your budget on exceptional ingredients, ultimately enhancing the flavor of your homebrew.
As you embark on your brewing adventure, it’s worth remembering that the best beer brewing bottles under $20 can set the foundation for countless brews to come. With proper care and storage, these bottles can serve you well through many brewing cycles. So, gather your ingredients, choose your bottles wisely, and get ready to be amazed at what you can create. Who knows? Your next batch might just become a favorite among friends and family!
The Best Beer Brewing Bottles Under $20
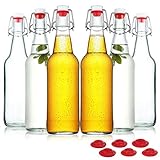
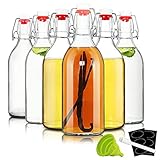
1. Bottlesmith 12 oz Beer Bottles
I still remember the first time I cracked open a Bottlesmith beer bottle. It was a sunny Saturday afternoon, and I was excited to showcase my first homebrew to friends at a small gathering. The bottles have this classic feel to them that just elevates the whole experience. As I poured into the glasses, the golden hues of my brew shimmered, and I felt a surge of pride. The sturdy glass felt reassuring in my hands, and my friends immediately commented on how professional my setup looked.
After a few rounds, we noticed something delightful about these bottles. The design included a wide mouth, which made filling them a breeze, and the caps sealed tightly, preventing any awkward spills during transport. I decided to take a few over to a neighbor who loved craft beer as much as I did. He was impressed not just by the taste but also by how sophisticated the Bottlesmith bottles made my brew appear. Who knew that under $20 could deliver such a high-quality experience?
2. Northern Brewer Amber Glass Beer Bottles
The first time I got my hands on Northern Brewer amber glass beer bottles, I felt like a kid with a new toy. I’d just started my brewing journey, and the amber color of these bottles was irresistible. It reminded me of the traditional beers I enjoyed at my favorite brewery. Filling them was so satisfying, and the way they looked lined up on my kitchen counter made me feel like a true artisan. My friends would pop by and do a double-take, impressed at how I’d transformed my hobby into something tangible.
What I loved most, though, was how these bottles protected my precious brews from light. No skunky flavors on my watch! When I finally got the chance to crack one open at a backyard BBQ, everyone was pleasantly surprised by the crisp taste and aroma. Northern Brewer really nailed it with these bottles. They made it so easy for me to share my passion while making my brew look and taste irresistible—definitely a win for under 20 bucks!
3. Star San Easy Clean Beer Bottles
I stumbled upon the Star San Easy Clean bottles during a frantic last-minute shopping trip for my annual homebrew contest. With little time to spare, I eagerly grabbed a case because they promised to simplify my cleanup process. Just like that, I was back home feeling like a brewing pro. I couldn’t believe how easy it was to prepare these bottles; a quick rinse and they were ready to be filled. Talk about easing my brewing anxiety!
When the day of the competition arrived, I filled my Star San bottles with a rich stout, and they looked gorgeous under the event lights. As I shared my brew with fellow enthusiasts, everyone complimented not just the flavor but also the bottle design. It felt good knowing that I had spent less than twenty bucks for something that elevated my brewing game so significantly. It’s funny how the right bottles can turn an ordinary craft into an unforgettable experience!
4. Mr. Beer 12 oz Bottling Kit
When I first purchased the Mr. Beer 12 oz bottling kit, I was just dipping my toes into the brewing world, unsure of what to expect. The kit came with everything I needed, including the bottles that were ready to go. I remember the excitement of filling those bottles with my very first brew—pale ale that I was convinced would impress my friends. As I capped them, I felt like a true brewmaster, sealing in all that flavor and love with each twist of the cap.
When the big day arrived for tasting, I was nervous, but the moment my friends took a sip, their faces lit up. They couldn’t believe I had brewed it myself! The Mr. Beer bottles were sturdy and had a vintage charm that made everything feel special. It was a proud moment—a shared celebration where I realized that brewing was more than just a hobby for me. It gave me a wonderful reason to connect, create memories, and enjoy fantastic beer—all for under twenty dollars!
5. Craft Beer Bottling System
The first time I used the Craft Beer Bottling System, I was absolutely in love with how streamlined the whole process felt. Instead of the usual chaos around bottling day, this system made everything straightforward. The bottles themselves are compact, and I loved how they fit neatly into my brewing space. When I began filling them, the integrated filling tool made it so much easier; I was no longer worrying about spills or foam disasters. It felt wonderfully efficient!
As I shared my first batch using these bottles with friends, the reaction was priceless. They couldn’t get over how lovely and professional the packaging looked, and the flavor was even better than I had anticipated. I was thrilled to see my hard work pay off—they devoured every ounce! One friend joked that I needed to start charging for these, and we all laughed. It’s amazing how a system like this, priced under $20, can truly make one feel like a master brewer while bringing everyone together over good times and great beer.
Why You Need to Buy Beer Brewing Bottles Under $20
When it comes to home brewing, having the right equipment is essential to producing a great-tasting beer. However, many budding brewers might be put off by the thought of investing heavily in their new hobby. Fortunately, there are excellent beer brewing bottles available for under $20 that are perfect for starting your brewing journey without breaking the bank. These affordable bottles not only save you money but also allow you to experiment and craft your favorite brews with ease.
Imagine a cozy gathering with friends where everyone enjoys craft beers brewed right in your kitchen. You want to show off your brewing skills, but the thought of spending a fortune on glass bottles might seem daunting. That’s where budget-friendly options come in. The best beer brewing bottles under $20 offer practicality without compromising quality. They’re designed to withstand fermentation, ensuring your hard work culminates in delicious craft beer that everyone will love. Plus, you won’t have to worry about ruining expensive bottles if something goes awry when you’re first starting out.
Another compelling reason to opt for these affordable brewing bottles is the convenience they offer. Many of the top-rated options feature easy-to-clean materials and user-friendly designs, making the brewing process far more enjoyable. After a long day at work, the last thing you want is to grapple with complicated equipment. With bottles priced under $20, you can easily store your brews without feeling overwhelmed. So whether you’re a novice or a seasoned brewer, these options ensure that you spend less time stressing over your setup and more time enjoying your craft.
Lastly, investing in inexpensive brewing bottles under $20 encourages experimentation and growth. Perhaps you want to try a new recipe or add unique flavors to your beer – you won’t hesitate to explore these ideas when you’re not tied down by expensive equipment. Plus, as you progress in your brewing journey, these budget-friendly bottles can become your go-to vessels for testing smaller batches or seasonal brews. Ultimately, these bottles help foster your passion for brewing in a way that’s both practical and fun, allowing you to develop your craft while keeping your wallet happy.
Understanding Different Types of Beer Brewing Bottles
When it comes to beer brewing bottles, not all are created equal. You’ll typically encounter three main types: glass bottles, plastic bottles, and growlers. Each type has its own set of benefits and drawbacks, particularly when you’re trying to stay under that $20 price point.
Glass bottles are often the preferred choice among serious brewers. They do an excellent job of preserving the flavor and carbonation of beer, allowing this beverage to age gracefully. However, the fragility of glass can be an issue, especially if you’re brewing in larger batches or have pets that might knock them over. If you’re looking for bottles that can endure a bit of rough handling, glass might not be the best option for you.
Plastic bottles, on the other hand, offer durability without sacrificing affordability. They won’t shatter if dropped, making them perfect for those who might want to brew out in the backyard or for those who have kids running around. Many brewers opt for PET plastic bottles, which are designed to withstand pressure and provide a viable alternative to glass for those who might be concerned about breakage. Do keep in mind, though, that plastic bottles might not offer the best seal over time compared to glass.
Lastly, we have growlers, which typically come in larger volumes and are great for when you want to share your homebrew with friends. They can be sealed tightly and kept fresh for a longer period than some smaller options. If you frequently host gatherings or enjoy sharing your latest batch with friends, investing in a growler could prove beneficial and satisfy your social brewing needs while still allowing you to stick to your budget.
Tips for Properly Cleaning and Storing Brewing Bottles
Now that you’ve chosen your brewing bottles, the next step is ensuring they remain in top condition. Proper cleaning and storage are essential to maintain the integrity of your homebrew. You wouldn’t want to ruin a year-long project due to subtle bacteria or leftover residue.
Start by rinsing your bottles immediately after emptying them. The longer you wait, the more difficult it will be to clean. A simple rinse can prevent stains and odors from developing. Remember that most breweries recommend sanitizing your bottles before the next use. You can do this with store-bought sanitizers or a simple solution of water and unscented bleach, but make sure to rinse thoroughly afterward since any remaining bleach can spoil the taste of your beer.
When it comes to storing your bottles, it’s best to place them upside down in a clean area, preferably on a drying rack. This prevents dust from entering the bottles while allowing any residual water to run out. If you have extra space, consider storing them in a dark, cool place. Sunlight can degrade the quality of both the glass and the beer inside.
Lastly, avoid stacking bottles directly on top of each other, as this can lead to breakage or scratches that might harbor bacteria. Treat your bottles with care, and they’ll be your best friends in your brewing journey!
Common Mistakes to Avoid When Using Beer Brewing Bottles
Even seasoned brewers can fall into traps when it comes to using their brewing bottles, especially budget-friendly models. One common mistake is skipping the sanitization process. Not taking this crucial step can ruin your batch, turning what should be a delicious brew into a sour mess. Remember, cleanliness is next to brewing godliness!
Another pitfall is not properly checking bottles for damage before filling them. Cracks or chips may not be visible initially, but they can lead to leakage or even breakage during fermentation. It’s always wise to inspect your bottles closely and toss any that show signs of wear.
A frequent mistake many novice brewers make is not understanding their bottles’ pressure capabilities. Depending on your brew, you could end up over-carbonating, leading to a bubbly explosion when opening the top. Make sure that the bottles you’ve chosen can withstand the pressure generated during fermentation, especially if you’re experimenting with lively ales or lagers.
Lastly, many brewers don’t consider the importance of labeling. If you’re brewing multiple batches or different styles, it can get confusing trying to figure out which is which. Use simple labels to indicate the content, date, and any specific notes related to that batch. It’s an easy step that can save a lot of headache later when you’re eager to enjoy the fruits of your labor!
Exploring Budget-Friendly DIY Options for Beer Brewing Bottles
Brewing doesn’t always have to come with a hefty price tag. If you want to stay budget-friendly, you might be surprised to find that there are several DIY options for creating your own beer brewing bottles. Oftentimes, the most common solution is repurposing old bottles from beverages you’ve already enjoyed, which can be a fun, creative project.
Start with standard glass bottles like those from soda or commercial beers. Just make sure they have thick glass and are made for carbonated beverages. Clean them thoroughly, following the aforementioned sanitization tips. You can even add your own unique flair by using glass etching supplies to personalize them, making your homebrew even more special when you share it with friends and family.
If you’re feeling adventurous, consider making your own growler from a cleaned and sanitized mason jar. They’re designed to hold liquids tightly and can serve as the perfect container for your creations. Plus, they’re versatile; if you don’t end up using them for beer, they make great storage for other food items!
Lastly, think about using BPA-free plastic bottles. Though not traditionally for brewing, they can work in a pinch if you are cautious about following fermentation tips carefully. Many soda bottles are made from such materials and can hold up adequately for small homebrew batches and experiments. The key here is to ensure they can handle the carbonation and pressure effectively.
Best Beer Brewing Bottles Under $20: Your Ultimate Buying Guide
So, you’ve decided to dip your toes into the wonderful world of homebrewing? That’s a fantastic journey filled with creativity, flavors, and perhaps a few small hiccups (but that’s part of the fun, right?). One of the most important aspects of brewing your own beer is finding the right bottles to store your delicious creations. Luckily for you, there are plenty of options that won’t break the bank! Here, we’ll cover some key factors to consider when selecting the best beer brewing bottles under $20. Grab a seat, and let’s chat!
1. Type of Bottle: Glass vs. Plastic
When it comes to beer bottles, the first thing to think about is the material. Glass bottles are the classic choice for brewing. They preserve the flavor better and are more environmentally friendly. Plus, nothing beats the clink of glass when you toast your homebrew with friends. On the flip side, plastic bottles are lighter, which makes them easier to handle for beginners. They can also be less fragile—which might be something to consider if you’re accident-prone!
However, if you opt for plastic, ensure they’re specifically designed for brewing. Regular plastic bottles can leach chemicals into your beer, which is a definite no-no. So, if you’re really looking for the best beer brewing bottles under $20, invest in sturdy glass options. They’re a bit heavier but guarantee to keep your brew tasting fresh without any off-flavors.
2. Size Matters: Choose the Right Volume
Next up is size. Bottles typically come in a variety of volumes, so you need to decide which size works best for you. The most common sizes are 12 oz, 16 oz, and sometimes even 22 oz! Smaller bottles are great for sharing among friends, while larger ones might be perfect for special occasions where you want to showcase your craft.
Think about how you plan to enjoy your beer. Do you like to take a few bottles to gatherings, or are you more of a sipper who enjoys a couple of pints at home? If you know you’ll be sharing your homebrew, consider a mix of sizes to suit different scenarios. Remember, whatever you choose, you’re still getting the best beer brewing bottles under $20.
3. Closure Type: Caps or Corks?
Ah, the great closure debate! Most beer enthusiasts will tell you that crown caps are the way to go. They provide a tight seal that prevents any unwanted air from ruining your lovely brew. Plus, they’re super easy to use—just pop them on with a capper and you’re set. However, if you want to tap into the world of funky flavors and yeast, corks could give your beer more character!
Corked bottles are more common for specialty brews, as they allow for some oxygen transfer. Just keep in mind that using corks may require a bit more finesse in your brewing process. If you’re just starting, sticking with capped bottles can help ensure more consistent results without the worry of cork taint. Whichever you choose, make sure to get the right equipment for sealing as part of your investment!
4. Design and Aesthetics
Let’s be honest—when you put so much effort into brewing, the last thing you want is a boring bottle. The aesthetics of your beer bottles can be just as important as their functionality. Many brewing bottles come in attractive designs that add a personal flair to your homebrew. Some may even have the option to customize labels, making your beer the star of any gathering!
When choosing between the best beer brewing bottles under $20, consider if you want clear, green, or brown glass. Brown bottles provide better protection from UV light, which can spoil beer, but a clear bottle can showcase that lovely amber hue you’ve crafted! A little creativity in your bottle choice can truly elevate the experience for both you and your friends.
5. Durability: Handle with Care
We all have that one friend who’s a bit clumsy, right? Well, durability in your beer bottles is crucial, especially if you’re the type who likes to move them around. Glass bottles can shatter if dropped, so you’ll want to ensure you handle them with care. Some brands are thicker and more resilient than others, so look for bottles that are well-made and less prone to cracking.
On the other hand, if you’re opting for plastic bottles, you usually don’t have to worry as much about breakage. They can take a beating but be sure they’re made for brewing, as regular plastic may warp or degrade over time with carbonated beverages. When shopping for the best beer brewing bottles under $20, durability should definitely be on your checklist, especially considering murphy’s law—what can go wrong will go wrong!
6. Cleaning and Reusability
Cleaning your bottles is probably one of the least exciting parts of homebrewing, but it’s incredibly important! Look for bottles that are easy to clean and sanitize, because a dirty bottle can ruin your hard work. Many glass bottles can withstand high temperatures, which is helpful when it comes time for sterilization. Some even have wide openings for easy access and scrubbing!
If you’re considering reusability, glass bottles definitely get the gold star here. Unlike single-use plastic, you can brew batch after batch in glass while ensuring a clean environment every time. Just remember to check for any cracks or chips if you’re reusing bottles. They might seem like small details, but they matter immensely for the integrity of your brew!
7. Cost-Effectiveness: Budget-Friendly Options
Let’s talk money—homebrewing can get expensive, so finding the best beer brewing bottles under $20 is essential! Luckily, there are many options available, but you want to find something that balances quality with cost. Sometimes, buying bulk can save you a bit more cash in the long run, so keep an eye out for packages that offer discounts!
Even if you’re on a budget, it’s worth investing in good quality bottles to protect your brew. Imagine working hard all week, brewing your beer, and then having it spoiled because of a cheap bottle. That’s a heartbreaker! So, do your research and find reliable brands that offer competitive pricing while still providing durability and design. It’s the perfect way to support your new brewing habit without going over budget!
Finding the best beer brewing bottles under $20 doesn’t have to be a daunting task—just keep these factors in mind, and you’ll be well on your way to sharing your homemade brews. Enjoy your brewing adventure! You’ve got this!
Frequently Asked Questions
What types of beer brewing bottles are best for beginners?
When diving into the world of home brewing, beginners often find that amber glass bottles are a great choice. They effectively block harmful UV light, protecting the beer from skunking, while also looking aesthetically pleasing on any shelf. Many brewers also favor the sturdiness of glass; it’s less likely to warp or degrade over time compared to plastic alternatives.
Another solid option for beginners is PET plastic bottles, which are lightweight and less prone to breakage. They allow for carbonation checks, as you can squeeze them to feel the pressure inside. Just keep in mind that while they’re convenient, PET bottles generally have a shorter shelf life, so they’re best used for immediate consumption of your delicious brews.
How should I clean and sanitize my beer bottles before use?
Cleaning and sanitizing your beer bottles is a key step in ensuring that your homebrew turns out perfect. Start by rinsing out any residual beer or sediment immediately after use—this prevents hard-to-remove stains. A bottle brush and warm, soapy water work wonders, but make sure to give them a thorough rinse afterward to eliminate any soap residue that could affect your brew’s flavor.
Once cleaned, sanitizing is crucial, and there are several effective methods to choose from. Many brewers opt for no-rinse sanitizers that can be quickly applied without rinsing, simplifying the process significantly. Alternatively, you can use a solution of water and bleach (1 tablespoon per gallon), but be cautious to rinse well afterward. Whether you choose to soak or spray, ensuring your bottles are sanitized will help bring out the best in every batch.
Are swing-top bottles worth the investment?
Swing-top bottles are a popular choice among many home brewers, and for good reason! They offer a great seal that keeps carbonation levels high, and they’re super convenient for bottling since you won’t need to fuss with caps and a capper. Plus, the added charm of the swing-top design makes your homebrew look quite impressive when shared with friends.
While they might be a bit pricier than standard capped bottles, they often last longer due to their robust construction. You can reuse them multiple times without worrying much about wear and tear. Just remember that proper cleaning and sanitizing is essential to maintain their performance and prolong their lifespan, ensuring that they continue to deliver great-tasting results for your brews.
Can I reuse old beer bottles, and how do I prepare them?
Absolutely, you can reuse old beer bottles, which is a fantastic way to save money and be environmentally friendly! When choosing to reuse, it’s important to ensure they’ve been thoroughly cleaned and sanitized to avoid contamination. Look out for any chips or cracks, as these can weaken the bottle and lead to breakage during carbonation.
To prepare used bottles, start by soaking them in warm, soapy water to loosen any adhesive labels or residual beer. A bottle brush helps immensely with scrubbing away stubborn residue. After rinsing them well, move on to sanitizing your bottles. Many home brewers recommend a soaking method with a no-rinse sanitizer to streamline the process. Taking these steps will significantly enhance the quality of your homebrew and give you peace of mind.
What are the benefits of using dark bottles versus light bottles?
Using dark bottles, such as amber or brown glass, can significantly impact your beer’s quality by protecting it from harmful UV rays. Light can lead to a chemical reaction in hops, causing that notorious skunky flavor many brewers want to avoid. Dark bottles safeguard your beer from these rays, ensuring a fresher taste and appearance even over time.
On the other hand, light bottles, like clear glass, can show off the visual appeal of your brews, but they do have their drawbacks. If exposed to light too long, you risk unwanted flavors developing. However, if you drink your beer quickly and store it in a dark place, you can enjoy the aesthetics of lighter bottles without too much concern. It ultimately boils down to personal preference and brewing style, but dark bottles are generally the go-to for preserving flavor.
What’s the difference between bottle conditioning and force carbonating?
Bottle conditioning and force carbonation are two popular methods brewers use to carbonate their beer, and each has its unique charm. Bottle conditioning involves adding a little sugar and yeast to the beer just before sealing it in bottles, allowing carbonation to develop naturally as the yeast ferments the added sugar. This process can create a lovely, nuanced flavor profile while also contributing to a natural, creamy mouthfeel.
On the flip side, force carbonating involves using a CO2 tank to inject carbon dioxide directly into the beer. This method is quicker and gives you more control over the level of carbonation you desire, making it a preferred choice for many home brewing enthusiasts. However, it might not impart the same subtle complexities that naturally fermented carbonation does. Whether you choose one method over the other depends on your preferences, and both can lead to delicious results.
When should I replace my beer bottles?
Knowing when to replace your beer bottles is crucial for maintaining the quality of your brews. Signs such as cracks, chips, or haziness indicate that it may be time to let them go. Even a tiny flaw can compromise the integrity of the seal and potentially spoil your beer, not to mention the risk of breakage during storage or bottling.
Additionally, if you notice that your bottles have become discolored or have developed a persistent odor—even after thorough cleaning and sanitization—it’s best to replace them. Investing in good-quality bottles can enhance your brewing experience, and it’s worth it to ensure that every batch you create is perfect. While it may be tempting to hold onto bottles for sentimental reasons, your taste buds will thank you for keeping them in top condition!
Final Words
In conclusion, selecting one of the best beer brewing bottles under $20 is not just about finding an affordable option—it’s about stepping into the wonderful world of brewing with the right tools. With so many fantastic choices available, you’re sure to find a bottle that fits your brewing style and helps you bring your unique vision to life. Remember, every great brew starts with the right equipment and a passion for the craft, and you’re well on your way to creating something truly special.
So, as you make your decision on which bottles to choose, embrace this exciting journey! Whether you’re a seasoned pro or just starting out, each batch you brew is a chance to experiment, learn, and grow. Take that leap and invest in your brewing adventure—you’ve got this! Cheers to brewing your best batch yet!