You’ve just inherited a beautiful antique cabinet from your grandmother, full of memories and stories, but it’s hidden beneath layers of old paint and scratches. The thought of restoring it feels both exciting and daunting. You grab your tools, eager to bring this treasured piece back to life, but then comes the realization: how do you achieve that perfectly smooth finish without ruining it? This is where the hunt for the best sanders for cabinets begins, transforming your nostalgic project into a rewarding journey.
As you delve into the world of sanding, you quickly discover there’s no one-size-fits-all solution. The right sander can make all the difference between a frustrating experience and a smooth result that brings out the natural beauty of the wood grain. Whether you’re a seasoned DIYer or a first-time furniture renovator, understanding your options is key. In this article, we’ll explore the best sanders for cabinets, highlighting their features and benefits, along with essential tips to help you choose the perfect tool to give your cabinet the love it deserves.
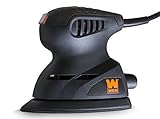
We’ll cover the best sanders for cabinets in a moment, but first, here are some related products from Amazon:


Last update on 2026-02-08 / #ad / Affiliate links / Images from Amazon Product Advertising API
Finding the Best Sanders for Cabinets: A Friendly Guide
Imagine you’ve just decided to give your old cabinets a fresh, new look. You stand in your kitchen, envisioning the beautiful, vibrant finish, but then reality hits: what about the prep work? Cabinet refinishing often begins with sanding, and the right tool can make all the difference in achieving that smooth, professional finish. This is where understanding the best sanders for cabinets becomes crucial in your DIY journey.
You might be surprised to learn that sanding accounts for roughly 75% of the time spent on refinishing furniture, according to industry experts. This little statistic underscores the importance of having the right sander on hand. Whether you’re a seasoned pro or a weekend warrior, selecting the best sanders for cabinets can drastically reduce your workload and improve your results. From orbital sanders to detail sanders, each tool offers unique benefits depending on the size and intricacies of the project at hand.
As you dive deeper into your research, you’ll find that different sanders cater to various needs. For larger, flat surfaces, a belt sander can speed up the process tremendously, allowing you to remove old paint or stain quickly. On the other hand, when it comes to corners and tight spots, a detail sander is a must-have. Knowing which sander to use for specific tasks will not only save you time but also deliver the quality finish that makes your cabinetry shine.
Finally, don’t forget about the importance of using the right sandpaper grit. A common mistake is starting with too coarse of a grit, which can lead to scratches and damage. Instead, beginning with a medium grit and gradually progressing to a finer one is key to achieving that perfect, smooth surface. In this guide, we’ll delve into the best sanders for cabinets and help you choose the right tool for your next project, ensuring your craftsmanship turns heads for all the right reasons!
Top 5 Best Sanders For Cabinets
1. Makita BO5041K 5-Inch Random Orbit Sander
I remember the first time I tackled my kitchen cabinets; they were a faded shade of yellow from years of wear and tear. I decided to invest in the Makita BO5041K because I was looking for something that could handle a bit of a beating yet still give me a smooth finish. Let me tell you, this sander became my best friend. Its ergonomic design felt comfortable in my hands, and the variable speed control really let me customize the intensity based on how stubborn the paint was. I’ll never forget that satisfying moment when I successfully stripped off the old finish with minimal effort and zero gouges.
Another highlight was how quiet this machine is compared to others I’ve used. It didn’t feel like I was blasting a jet engine in my garage. Plus, the dust collection system helped keep my workspace cleaner than previous projects. I felt accomplished and proud of my work using the Makita, and in the end, the cabinets looked fabulous and new again. It’s like giving them a well-deserved spa day!
2. Dewalt DWE6423K 5-Inch Variable Speed Random Orbit Sander
When I decided to refinish my bathroom cabinets, I wanted a sander that would help me tackle the tight corners and intricate details without making me feel like I was wrestling a wild animal. That’s when I found the Dewalt DWE6423K, and it immediately made the job feel less daunting. With its variable speed settings, I could go slow around the delicate edges and then really ramp up the power for the larger flat surfaces. No more worrying about uneven spots; it glided over everything like a dream.
What really won me over was the dust-sealed switch. I’ve lost track of how many projects I’ve done where dust has found its way into the tools and caused issues. With the Dewalt, I felt assured that it would last through many more cabinet transformations. I ended up finishing the project ahead of schedule, allowing me to enjoy a cozy evening with my favorite cup of tea, proud of the way my cabinets turned out. It took the intimidation out of refinishing for me!
3. Bosch ROS20VSC 5-Inch Palm Sander
Ah, the rusted old cabinet in my garage was crying for some TLC. I couldn’t wait to tackle this project, so I opted for the Bosch ROS20VSC, which had been praised by other DIY enthusiasts. Right out of the box, it felt like a sturdy little powerhouse. I loved how lightweight and easy it was to maneuver. The moment I plugged it in and felt it vibrate to life, I knew I was in for a fun afternoon. This sander made quick work of the rough patches, and the comfortable grip made those long hours fly by.
I was particularly impressed by the built-in microfilter system that collected dust right where it came from, making clean-up a breeze. Now, I wouldn’t say it was completely mess-free, but I didn’t have to spend an hour cleaning up the workshop afterward. That alone was a huge relief! Watching those cabinets transform before my eyes made me realize how the right tool can completely change your experience. Seeing the final results, I couldn’t help but smile at how my once-neglected cabinet now looked like a charming piece ready for a new home.
4. Ridgid R2601 5-Inch Random Orbit Sander
It was a rainy weekend when I finally decided to tackle my living room cabinets, and the Ridgid R2601 seemed like the perfect companion for the job. I loved the way it felt in my hand, providing a nice balance that helped me navigate the curves and angles of the cabinet doors effortlessly. It made fast work of those stubborn layers of old paint, and I felt like a professional right from the start! The random orbit feature ensured I didn’t end up with swirl marks, which is a recurring nightmare for most DIYers.
Equipped with a built-in dust bag, it surprisingly captured most of the mess as I worked away. I don’t know about you, but I always dread the aftermath of projects. However, the Ridgid made the whole process smoother and cleaner. As I wiped down my newly sanded cabinets, I couldn’t believe how much more alive they looked. It’s remarkable how a little careful sanding can breathe new life into furniture, and I’ve never enjoyed home improvement quite so much!
5. Black+Decker BDERO100 5-Inch Random Orbit Sander
There’s something incredibly satisfying about tackling DIY projects when you have just the right tools on hand. Enter the Black+Decker BDERO100, which I picked up on a whim for my latest cabinet refinishing adventure. From the moment I started sanding, it was like I could feel my worries melt away. This little sander is lightweight yet powerful, making it easy to glide over surfaces without straining. I felt like I could sand for hours without getting tired, which was great because I had a lot of ground to cover!
One of my favorite features was how user-friendly it was. The dust bag was easy to empty, and I appreciated that the design was intuitive for someone like me, who was still learning the ropes of DIY. I managed to complete the project in record time and felt so accomplished seeing the transformation. The Black+Decker delivered a smooth finish that made my cabinets sing again, and I now proudly share my newly refinished cabinets with friends and family. It’s a win in my book!
Why Do People Need to Buy Sanders for Cabinets?
When it comes to refurbishing or building cabinets, having the right tools can mean the difference between a frustrating task and a smooth, enjoyable process. One essential tool that every DIY enthusiast or professional should consider is a sander. Sanders are designed to streamline the preparation and finishing phases of cabinet work, making it easier to achieve a flawless surface. Imagine tackling a cabinetry project only to find yourself stuck in laborious sanding with inadequate tools. With the best sanders for cabinets, you can save time and energy, allowing you to focus on bringing your creative vision to life.
Consider the scenario where you’re trying to give your old cabinets a fresh look. A handheld sander allows you to effortlessly smooth out rough patches, ensuring that the surface is ready for staining or painting. Think of it as giving your cabinets a refreshing spa day! A high-quality sander not only speeds up this process but also produces a more uniform surface compared to manual sanding. Moreover, when you use the best sanders for cabinets, you rest assured knowing that you’ll avoid the pitfall of uneven finishes, which can become painfully noticeable once you apply your topcoat.
Beyond just aesthetics, using a sander can greatly enhance the durability of your cabinets. By properly preparing the surface, your paint or finish adheres better, resulting in a longer-lasting result. Picture the satisfaction of knowing that the effort you put into prepping your cabinets will pay off in the form of a beautiful, resilient finish that can withstand the test of time. It’s not just about how your cabinets look today; it’s about ensuring they maintain that appeal for years to come. Choosing the right sander can be pivotal in achieving that longevity.
Finally, investing in a sander tailored for cabinetry can improve your overall woodworking experience. The right tool diminishes fatigue and allows for precision work, meaning you can tackle even the most intricate details with ease. Whether you’re a seasoned professional or a weekend hobbyist, having a dependable sander in your toolkit can boost your confidence. You’ll find yourself taking on more ambitious projects, transforming spaces, and reveling in the gratification of seeing your hard work pay off. In the world of cabinet renovation, a good sander is not just a tool; it’s an indispensable companion on your creative journey.
Types of Sanders: Which One is Right for Your Cabinet Project?
When it comes to sanding cabinets, choosing the right type of sander can significantly affect your results. The most common types include orbital sanders, belt sanders, and detail sanders. Understanding each type is key to matching them with your specific project needs. For instance, if you’re dealing with intricate designs or tight corners in a kitchen cabinet, a detail sander would be ideal since it can reach those hard-to-access areas.
On the other hand, for larger, flat surfaces, an orbital sander shines due to its fast and efficient operation. If your project involves heavy material removal, a belt sander offers speed and power that can help you get the job done quicker. Thus, before diving into your cabinet renovation project, consider the shape and size of your cabinets, the type of finish you desire, and the detailed work necessary to choose the proper sander.
Another essential factor to consider is the grit of the sanding paper you plan to use. Different sanders can accommodate various grits, impacting how smooth the surface will be. Starting with a coarser grit for heavy sanding and finishing off with finer grits for a smooth touch can drastically improve your project’s quality and reduce the need for extensive refinishing later.
Safety Precautions While Using Sanders
Safety should always come first, especially when dealing with power tools like sanders. One of the most critical precautions is wearing safety goggles to protect your eyes from flying dust and debris that can easily cause irritation or damage. Additionally, a dust mask is essential to prevent respiratory issues from inhaling fine wood particles. Believe me, the little extra time spent on safety gear can save you from a world of discomfort later.
Ensure you are using your sander in a well-ventilated area to reduce airborne dust accumulation. Consider setting up a dust collection system if you have one, as this can help keep your workspace cleaner and safer. For the occasional splinter or minor mishap, always have first-aid supplies on hand. A clean and organized workspace can significantly reduce the likelihood of accidents, so take a moment to plan your area before you begin.
It’s also vital to follow the manufacturer’s instructions for your specific sander model. Each tool has its safety features, and understanding these can enhance your efficiency and safety. If you’re new to using sanders, practice on scrap wood before moving to your cabinets. This approach not only helps you get accustomed to the tool but ensures you won’t damage your cabinets with improper usage.
Maintenance Tips for Your Sanding Tools
Maintaining your sander is crucial for achieving optimal performance and longevity. Regular cleaning of the sanding pads and dust ports is essential. After every use, take a few moments to remove dust build-up, as accumulated debris can impair the sander’s efficiency and lead to unsatisfactory results. A clean tool not only provides better finishes but also runs cooler and prolongs its lifespan.
Storage is another key aspect of maintenance. Keep your sanders in a dry, clean space and protect them from humidity. If you’re using sandpaper, make sure it’s stored properly as well; excessive moisture can warp it and affect its performance. Also, regularly check the condition of your sandpaper; a dull pad can cause more harm than good, leading to uneven surfaces or even damaging your cabinets.
Lastly, consider investing in replacement parts. Over time, components like cords or switches may wear out. Staying on top of these small repairs can save you from larger issues down the line. By treating your tools with care, you’ll find that they serve you well for countless projects, providing consistent results each time you tackle a new cabinet endeavor.
DIY Cabinet Sanding Projects: A Step-by-Step Guide
For those of you considering a DIY approach to cabinet refinishing, having a step-by-step guide can make the process much smoother. First, start by preparing your workspace. Lay down drop cloths to protect your floor and ensure you have ample lighting. This helps you see all areas of your cabinets clearly, preventing mistakes during the sanding process.
Next, remove all cabinet doors and hardware. This removal allows you more access to the surfaces you’re sanding and prevents damaging zippers and knobs. Then, with your chosen sander in hand, begin with the coarser grit sandpaper on flat surfaces, working your way towards finer grits for finishing touches. Always sand in the direction of the wood grain to avoid scratches that can be difficult to remove later.
Finally, make sure to finish up with thorough cleaning. After sanding, wipe down all surfaces to remove dust. This step is crucial for ensuring a good bond with your chosen finish, whether that’s paint, stain, or lacquer. In engaging in a cabinet sanding project with these clear steps, not only will you enhance the beauty of your cabinetry, but you’ll also gain a sense of accomplishment knowing you’ve done it yourself.
Best Sanders For Cabinets
When it comes to refinishing or refurbishing your cabinets, having the right tools in your arsenal can make all the difference. Among those tools, a quality sander is indispensable. Whether you’re a seasoned DIYer or just starting your home improvement journey, choosing the best sanders for cabinets can be a game-changer in achieving a smooth, professional-looking finish. So, grab a cup of coffee, and let’s dive into some important factors to consider when selecting the perfect sander for your cabinetry projects.
1. Type of Sander
When selecting a sander, the first thing to consider is the type of sander that best suits your needs. There are various types—belt sanders, orbital sanders, detail sanders, and more—each designed for specific tasks. For cabinets, an orbital sander is often the best choice, as it provides a smooth finish without leaving deep scratch marks. If you’re working on intricate areas, a detail sander can help reach those tricky spots.
Think about the types of projects you’ll tackle. If you plan to work on large surfaces, a belt sander might be your best bet, while smaller touch-ups could warrant a compact detail sander. Understanding the differences and selecting the right type will ensure you have the right tool for the job, saving you time and frustration.
2. Power and Speed
Next up, we have power and speed. The skill of a sander often lies in its motor strength and speed settings. A more powerful sander not only sands faster but also handles tougher materials effortlessly. Look for sanders with adjustable speed settings, allowing you to adapt the speed based on the project—whether you’re removing old finish or prepping wood for staining.
Having control over the speed is also crucial, especially for cabinets, where precision is key. Slower speeds are better for delicate finishes, while higher speeds can speed up material removal. Choosing a sander with versatile speed options can really enhance your sanding experience, making it friendly for both beginners and seasoned pros.
3. Ergonomics and Weight
Ergonomics may not sound like a significant factor, but trust me, it makes a world of difference. A sander that’s comfortable to hold and easy to maneuver will save your hands and back from unnecessary strain, especially if you’re sanding cabinets or larger projects for extended periods. Look for features like rubberized grips and lightweight designs that make it comfortable to handle.
Weight matters too; a lighter sander is easier to control and less tiring to use, especially when working at awkward angles or on tall cabinets. Take some time to hold a few different models in the store and choose one that feels right in your hands. Your future self will thank you!
4. Dust Collection System
Nobody enjoys making a mess, especially when it comes to working indoors. A good dust collection system in your sander can help keep your workspace clean and make the entire process more enjoyable. Look for sanders that come with built-in dust bags or ports that allow you to connect a vacuum for efficient dust collection.
Not only does this keep your workspace clean, but it also ensures that you see your progress as you work, without the haze of dust clouding your vision. Fewer particles in the air also means you’re protecting your respiratory health, which is a big plus when sanding down cabinets or any other woodwork.
5. Sandpaper Compatibility
Another important factor is sandpaper compatibility. Not all sanders use the same size or type of sandpaper, so make sure you choose one that suits your needs. Some sanders use specific hook-and-loop systems, while others may require adhesive-backed sandpaper.
Think about how easy or difficult it might be to replace the sandpaper; some sanders make changing papers a breeze, while others may be more of a hassle. Opting for a sander that allows for easy sandpaper changes will keep your workflow smooth and efficient, letting you focus more on the project rather than on fiddling with supplies.
6. Price and Warranty
Let’s talk about price. There’s a wide range of options available, from budget-friendly sanders to high-end models with all the bells and whistles. It’s important to find a balance between your budget and the features that meet your needs. Sometimes, spending a little more on a reliable tool can save you money in the long run by reducing the need for replacements.
Warranties are also worth considering—good manufacturers typically stand behind their products. A solid warranty can provide peace of mind, knowing you’re covered in case of any defects. Make sure to compare models within your price range and read reviews to get a feel for the reliability and performance of each sander.
7. User Reviews and Recommendations
Finally, never underestimate the power of user reviews and recommendations. Before making your purchase, take a few minutes to read what other users have to say about the sanders you’re considering. Look for feedback related to the specific tasks you’ll be doing, like sanding cabinets.
Friends and family can also offer valuable insights based on their experiences, so don’t hesitate to ask around. Reviews can help you uncover both the strengths and weaknesses of a tool, aiding you in making an informed decision. After all, learning from others’ experiences can often guide you to the best sanders for cabinets on the market.
In conclusion, finding the right sander doesn’t have to be overwhelming. By considering type, power, ergonomics, dust collection, compatibility, price, and reviews, you’ll be well on your way to making the best choice for your cabinet projects. Remember to take your time in weighing these factors, and you’ll soon be equipped with a trusty sander that will help you achieve fantastic results in your home. Happy sanding!
FAQ
What types of sanders are best for cabinets?
When it comes to sanding cabinets, the best types of sanders are typically orbital sanders, detail sanders, and belt sanders. Orbital sanders are fantastic for general sanding tasks because they provide a smooth finish without leaving swirl marks. They’re easy to handle and perfect for flat surfaces, making them an excellent choice for cabinet doors and panels.
Detail sanders are ideal for getting into those tricky corners and crevices that larger sanders can’t reach. If you have intricate designs or moldings on your cabinets, a detail sander can help you get a flawless finish. Belt sanders, while more aggressive, can be useful for removing substantial material and prepping surfaces quickly. Just remember to use them with care to avoid damaging your cabinets!
How do I choose the right sander for my cabinets?
Choosing the right sander for your cabinets depends on several factors, including the condition of the wood, the type of finish you desire, and your level of experience. Start by assessing the surfaces you’ll be sanding. If your cabinets are in decent shape but need a little refreshing, an orbital sander will do just fine. However, if you’re stripping old paint or stain, you might need the power of a belt sander.
It’s also essential to consider the weight and maneuverability of the sander. If you’re likely to do detailed work or extended jobs, a lightweight model would be less fatiguing. Look for sanders with variable speed settings too; this gives you more control, whether you’re sanding a rough surface or polishing up a finely engraved detail. Your comfort and the end result are key!
Is it necessary to sand cabinets before painting?
Yes, sanding cabinets before painting is highly recommended! Sanding helps create a smooth surface for the paint to adhere to, eliminating any grease, dirt, or old finish that could interfere with the new coat. You don’t have to sand down to bare wood; a light scuffing with the right grit sandpaper usually does the trick, giving the paint something to grip onto.
Moreover, sanding can highlight imperfections in the wood, allowing you to fill any gaps or scratches before you apply your paint. This extra prep work will lead to a more professional and polished look once you’re finished. So while it may feel like an extra step, it’s truly worth it in the end for the quality of the final result!
What grit sandpaper should I use for sanding cabinets?
When sanding cabinets, the grit of the sandpaper plays a crucial role in achieving the best finish. Generally, starting with a medium grit, such as 120 to 150, is a good idea for initial sanding. This grit will help to smooth out any imperfections and rough spots without being so coarse that it damages the wood. After you’ve got a nice even surface, you can switch to a finer grit, like 220, to prepare for painting.
If your cabinets are already painted and you’re just looking to give them a fresh coat, a finer grit between 180 and 220 is typically sufficient. This approach will help scuff up the old finish without making deep scratches that can show through your new paint. Remember, taking the time to choose the right grit will pay off in the long run with a smooth, beautiful finish!
Can I use a sander to remove paint from cabinets?
Absolutely, sanders can be an effective tool for removing paint from cabinets, especially if you prefer a less messy approach than chemical strippers. For this task, a powerful tool like a belt sander can be particularly useful due to its aggressive sanding action. Just remember to use it carefully to avoid gouging the wood beneath the paint. Start with a coarser grit sandpaper to remove the bulk of the paint, and then finish with a finer grit for a smooth finish.
However, it’s essential to know that while sanding is effective, it does create dust and potentially damage the wood if you’re not cautious. Always wear a mask and eye protection to avoid inhaling dust particles. Additionally, test a small, inconspicuous area first to ensure you’re comfortable with the method and results before tackling the entire cabinet!
How long does it typically take to sand cabinets?
The time it takes to sand cabinets can vary widely based on several factors, such as the size of the cabinets, the condition of the wood, and the type of sander used. For a standard kitchen cabinet set, you might expect to spend anywhere from a couple of hours to a full day. If you’re refinishing, this will likely require more time than if you’re just giving them a light sanding before painting.
If you’re new to sanding, it might take you a little longer to get used to the tool, but that’s perfectly normal! Take breaks as needed, and remember, patience is key for achieving a great finish. Rushing this step can lead to errors, so it’s best to enjoy the process and focus on making your cabinets look their best!
What safety precautions should I take while sanding cabinets?
Safety should always be a top priority when sanding cabinets. Start by wearing a good quality dust mask or respirator to avoid inhaling harmful dust particles, especially if you’re sanding older cabinets that may have been painted with lead-based paint. Protective eyewear is equally important to shield your eyes from flying dust and debris, as well as hearing protection if you’re using power sanders.
Additionally, make sure to work in a well-ventilated area to minimize dust buildup and potentially harmful fumes. It’s wise to keep a damp cloth or vacuum nearby to clean up excess dust as you go, maintaining a safe working environment. Taking these precautions will not only keep you safe but also make the sanding process more enjoyable and effective!
Verdict
In wrapping up our exploration of the best sanders for cabinets, it’s clear that selecting the right tool can transform your woodworking experience from a daunting task into a rewarding endeavor. Whether you’re a DIY enthusiast or a seasoned pro, the right sander can help you achieve that flawless finish you’ve been dreaming of. Remember, investing in quality tools not only enhances your projects but also ignites your passion for crafting beautiful pieces. So don’t hesitate—take your time, explore your options, and choose a sander that aligns with your vision and needs.
As you embark on your sanding journey, let the conviction that you have the power to elevate your craft drive you forward. Picture the stunning cabinets that will soon take shape under your careful touch. Embrace the process, trust your instincts, and get ready to create something extraordinary with the best sanders for cabinets. You’ve got this, and your next project is just a step away from becoming a reality!