Have you ever found yourself in a situation where you wanted to connect with loved ones, showcase a creative project, or even dive into the world of streaming, but felt limited by your device’s capabilities? The right webcam can make all the difference, especially when teaming up with a versatile machine like the Raspberry Pi 4. Whether you’re setting up a home video call system, capturing breathtaking timelapses, or simply exploring the realms of coding and DIY projects, finding the best webcam for your Raspberry Pi can transform your experience from ordinary to extraordinary.
In this ever-evolving digital landscape, top-notch webcams are no longer just for professional setups; they can become a vital part of your Raspberry Pi journey. From schools embracing remote learning to hobbyists delving into personal streaming, the demand for accessible, high-quality webcams has skyrocketed. In this article, we’ll dive into the best webcams compatible with the Raspberry Pi 4, complete with reviews and a buying guide to help steer you toward the perfect fit for your needs. Get ready to elevate your video experience and unlock a world of creative possibilities!
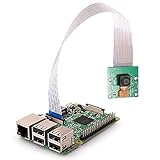
We’ll cover the best webcams for raspberry pi 4 in a moment, but first, here are some related products from Amazon:


Last update on 2026-02-27 / #ad / Affiliate links / Images from Amazon Product Advertising API
Finding the Best Webcams for Raspberry Pi 4
Imagine you’re diving into the world of DIY electronics, and you’ve got your hands on a Raspberry Pi 4. Excitement builds as you ponder all the projects you could tackle! Whether you’re creating a home surveillance system, developing a fun interactive robot, or building a video conferencing tool for remote work, one essential component comes to mind — a webcam. With the right choice, you can transform your Raspberry Pi into an impressive multimedia device that captures high-quality video and images, but how do you find the best webcams for Raspberry Pi 4 amidst the myriad of options available?
In the past few years, webcam technology has seen remarkable advancements, with statistics showing a 30% increase in demand as video conferencing becomes a norm. This surge isn’t just limited to the traditional webcams you might find sitting on your desk; Raspberry Pi users are tapping into various innovative solutions that can be connected to their devices. You’ll find an array of USB webcams, as well as high-definition camera modules specifically designed for the Raspberry Pi, designed to suit numerous applications from education to professional projects.
As you navigate through the choices, keep in mind a few essential features that will help you pinpoint the best webcams for Raspberry Pi 4. Factors like video resolution, frame rate, and compatibility can significantly impact your project’s success. For instance, a webcam that supports 1080p or even 4K resolution can make your video streaming endeavors look incredibly crisp and professional. Meanwhile, a high frame rate ensures smooth visual output, which is crucial for applications like real-time surveillance or gaming.
Additionally, the community surrounding Raspberry Pi is vibrant and supportive, so don’t hesitate to dive into forums for recommendations and personal experiences. Many enthusiasts have shared their insights on which webcams work best, making it easier for newcomers to choose wisely. Whether you’re looking for something budget-friendly or willing to splurge for higher quality, knowing what others have found successful can guide your decision-making process. With the right webcam, your Raspberry Pi 4 will become a versatile tool that exceeds expectations, unlocking possibilities you may never have thought possible!
5 Best Webcams For Raspberry Pi 4
1. Logitech C920 Webcam
I remember the first time I hooked up the Logitech C920 to my Raspberry Pi 4. It felt like I had tapped into a new world of clarity! The image quality was so crisp that I could see every detail on my face during video calls. It’s perfect for those Friday catch-ups with friends or family anytime. Plus, the built-in microphones did a decent job too, capturing my voice while filtering out the background noise – a lifesaver when my dog decides to go wild during a chat!
Setting it up was a breeze. I just plugged it in, fiddled with some simple configurations, and boom! I was good to go. There’s something rewarding about seeing your Raspberry Pi transform into a fully functional mini computer with such a reliable camera. And let’s not forget about how convenient the adjustable clip is for positioning – I could easily place it on my monitor or even on a tripod for more dynamic angles. It made me feel like a pro creator in no time!
2. Razer Kiyo Webcam
When I first laid eyes on the Razer Kiyo, I was drawn in by its unique ring light feature. As someone who always struggles with lighting while video chatting from my slightly gloomy room, this webcam turned out to be a game-changer. The built-in light not only made me look well-lit but also added this professional touch that made me feel more confident during meetings. It’s like having a natural glow – who wouldn’t want that?
Setting it up on my Raspberry Pi was no hassle at all. With just a few quick steps, I was livestreaming confidently, and friends couldn’t stop complimenting how good I looked on-screen. The Kiyo’s flexibility in adjusting brightness allowed me to customize my setup based on the time of day, turning my homely vibe into a studio-like experience. It transformed my mundane video calls into enjoyable, lively interactions!
3. Microsoft LifeCam HD-3000 Webcam
When I stumbled upon the Microsoft LifeCam HD-3000, I was thrilled with how affordable it was. I remember thinking, “Can it really provide quality for such a low price?” And to my surprise, it absolutely did! The 720p HD video quality was more than enough for my weekend webinars, and I really appreciated the built-in noise-canceling microphone. It felt like having a personal sound engineer who muted all the chaos from my busy household.
Getting it running on my Raspberry Pi 4 was a pleasant experience too! I simply plugged it in, and it was recognized immediately. The LifeCam even came with amusing little features that made it more fun to use, like color correction. I could still chat comfortably while knowing that my video quality wouldn’t let me down. Overall, it offered just the right mix of performance and value that made it a fantastic choice for anyone on a budget.
4. Logitech StreamCam Webcam
The first time I tried out the Logitech StreamCam with my Raspberry Pi 4, I felt like I had entered a new dimension of streaming. This camera was sleek, stylish, and the Full HD video quality was just breathtaking! I loved how it handled movement without blurring, so during my live gaming sessions, I felt incredibly dynamic and engaging. It took my amateur streaming to a whole new level – I couldn’t believe my Raspberry Pi was pulling this off!
What really sold me on the StreamCam was how it came with some brilliant software features that allowed me to customize my settings. Life on camera can feel daunting sometimes, but with the constant autofocus and smart framing features, I was left feeling at ease. I could shift perspectives during streams without breaking my vibe. The camera stood firm on my desk and never wobbled, which was a relief during my more animated discussions. Trust me, your viewers will appreciate the quality!
5. A4Tech PK-835 Webcam
I happened upon the A4Tech PK-835 when I was looking for something simple and straightforward. I decided to give it a spin with my Raspberry Pi 4, not expecting much, but guess what? It delivered beyond my expectations! The 720p resolution was perfectly adequate for my family catch-up calls, and the built-in microphone captured my voice clearly, making it easy to communicate. I loved that it had a plug-and-play feature, allowing me to just plug it in and start chatting without any extra hassle.
What really impressed me was how lightweight and portability-friendly it was. I could easily toss it in my bag if I needed to work from a different location, which is a huge plus for a mobile freelancer like me. It reminded me that simplicity doesn’t have to mean sacrificing quality. The affordable price and functionality made it the perfect little addition to my tech arsenal, proving that you don’t always need to go big to get great results!
Why Do People Need to Buy Webcams for Raspberry Pi 4?
In an era where remote communication is becoming increasingly essential, having a reliable webcam for your Raspberry Pi 4 can open up a world of possibilities. Imagine setting up a cozy video chat with family members who live far away, all thanks to the power of your Raspberry Pi. With the right webcam, you can transform your small computer into a full-fledged communication tool that enables seamless conversations. This not only strengthens personal connections but can also bridge the gap in business communications, offering a cost-effective solution for video conferencing.
Furthermore, the Raspberry Pi 4 is not just about personal use; it’s a favorite among DIY enthusiasts and hobbyists. Whether you’re venturing into home automation or creating your own security system, a quality webcam is an essential component of various projects. Picture setting up your very own smart security system that alerts you via video feed whenever someone approaches your door, giving you peace of mind no matter where you are. With the availability of affordable yet high-quality webcams, incorporating this technology into your projects has never been easier or more effective.
In addition, using a webcam with the Raspberry Pi 4 can enhance your learning experience, especially for those interested in programming and electronics. For instance, students can create interesting projects such as facial recognition systems or simple computer vision applications. The hands-on approach provides invaluable learning opportunities, allowing users to grasp complex concepts in a practical setting. By purchasing a good webcam, you gain access to endless potential projects that stimulate creativity and technical skills, making learning both fun and engaging.
Lastly, the versatility of webcams for Raspberry Pi 4 cannot be overstated. They are not limited to simple video streaming; you can also use them for live streaming your gaming sessions, broadcasting events, or even conducting live tutorials. The Raspberry Pi 4, when paired with the best webcams, can serve as a compact yet powerful media hub. Investing in a webcam not only boosts your Raspberry Pi’s capabilities but also enriches your digital experience, transforming it into a multifaceted device that adapts to your needs and interests.
Setting Up Your Webcam with Raspberry Pi 4
Setting up a webcam with your Raspberry Pi 4 can seem intimidating, but it’s easier than you might think! First, you need to ensure that your Raspberry Pi is powered on and has the necessary software installed. You’ll want to use an operating system like Raspberry Pi OS, which comes with all the essential libraries to get your webcam up and running in no time.
Connect your webcam via USB and ensure it’s detected by your Raspberry Pi. Opening a terminal window and typing `lsusb` will allow you to see if your webcam is recognized. If you’re looking to use your webcam for streaming or video conferencing, installing software like `fswebcam` or `Motion` can help you get the most out of your setup. From live streaming your cat’s antics to setting up a home surveillance system, the scenarios are endless!
Once your webcam is set up, you can experiment with various applications. For example, you might set up a time-lapse feature to capture a blossoming plant or monitor the progress of a DIY project. The ability to customize and tweak settings to your liking makes using a webcam with the Raspberry Pi a fun and rewarding experience.
Common Applications for Webcams with Raspberry Pi 4
Webcams and Raspberry Pi 4 are a match made in tech heaven, providing endless possibilities for both hobbyists and professionals. One of the most common applications is for home security systems. By placing your camera strategically around your home, you can monitor activity in real-time or set it to capture images only when motion is detected. With a little programming, you can even set it to send alerts directly to your smartphone!
Another popular use is for streaming live video. Whether you want to showcase your gaming skills, share DIY projects, or even host virtual meetings, your Raspberry Pi can handle the task. Using platforms like OBS Studio alongside your webcam allows for high-quality streaming options. With built-in video editing tools, you can add effects, overlays, and more to enhance your streams.
Creative projects are also a fantastic way to utilize a webcam with your Raspberry Pi. You might want to create a unique art installation or use facial recognition technology for an interactive display. From photo booths to augmented reality experiences, the ability to manipulate video feeds opens a whole new world of imagination and creativity.
Comparison of Different Webcam Models for Raspberry Pi 4
When choosing a webcam for your Raspberry Pi 4, not all models are created equal. Factors such as resolution, frame rate, and built-in features can greatly affect your experience. For instance, some webcams provide up to 1080p resolution at 30 frames per second, making them ideal for streaming and capturing high-quality images. In contrast, lower-end models may only offer 720p, which might suffice for simple video calls but won’t deliver the same clarity for detailed projects.
Another important aspect to consider is the field of view. For broader coverage, consider webcams with a wide-angle lens so you can capture more of your environment without needing multiple cameras. Some models even come with built-in microphones, offering a plug-and-play solution for those who need audio as well.
Moreover, compatibility with different software is crucial. Not every webcam works seamlessly with all Raspberry Pi applications, so researching user reviews or forums can give you insights into which models perform best. By weighing these factors, you can find a webcam that meets your specific needs, ensuring you get the most out of your Raspberry Pi 4 setup.
Tips for Optimizing Webcam Performance on Raspberry Pi 4
Once you’ve chosen your webcam and set it up, you might want to optimize its performance further. The Raspberry Pi community is rich with tips and tricks that can make a world of difference. One key aspect is ensuring that your Raspberry Pi is well-cooled. Overheating can lead to throttled performance, which is particularly critical during high-resolution streaming. You might consider adding a cooling fan or heat sinks to keep things running smoothly.
Another useful tip is to adjust the webcam settings to fit your environment. For instance, if you are in low-light conditions, tweaking the exposure settings can lead to significantly better image quality. Many webcams offer advanced options that you can control via software, so don’t hesitate to dive in and experiment.
Networking also plays a role in performance when streaming or capturing video. If you are using your Raspberry Pi for live streaming or remote access, make sure you have a strong and stable internet connection. A wired Ethernet connection often beats Wi-Fi in terms of reliability, especially when high data rates are required. With these optimizations in place, you should see a notable improvement in the performance of your webcam setup.
Best Webcams For Raspberry Pi 4: Your Ultimate Buying Guide
If you’re diving into the world of Raspberry Pi 4 and are on the lookout for the best webcams, you’ve come to the right place! Whether you’re planning to set up a home security system, dive into video streaming, or just want to experiment with some fun projects, the right webcam can make all the difference. With so many options out there, it can get pretty overwhelming. But don’t worry! I’m here to guide you through the nuances of choosing the perfect webcam for your Raspberry Pi 4. Let’s get started!
1. Compatibility with Raspberry Pi 4
When searching for the best webcams for Raspberry Pi 4, the first thing to keep in mind is compatibility. Not every webcam you find will work seamlessly with your Raspberry Pi 4 setup. Ensure that the webcam can interface with the Pi’s USB ports, as many modern cameras connect this way. Look for models that explicitly mention compatibility with Linux systems, as this is usually a good indicator that you’ll have an easy time using it with your Raspberry Pi.
Another great way to check compatibility is to visit forums or communities like the Raspberry Pi forums. Often, users will share their experiences with specific webcam models, giving you valuable insights on what works best. Remember, spending a little time on research now can save you a headache later when something doesn’t function as expected!
2. Image Quality
Next up is image quality, a critical factor for any webcam. When you’re looking at the best webcams for Raspberry Pi 4, you’ll want to consider resolution as a primary aspect. A webcam with at least 720p (HD) resolution should suffice for most basic uses, but if you’re looking to create higher quality streams or recordings, aim for 1080p. Clearer images make for a more professional appearance, especially if you plan to use it for presentations or streaming.
Beyond resolution, consider features like autofocus and low-light performance. Some webcams can automatically adjust to different lighting conditions, giving you crisp, clear images even in dim environments. This can be especially handy if your Raspberry Pi will be capturing video in varying light conditions, like in home security setups.
3. Frame Rate
Frame rate is another important aspect to ponder when selecting the best webcams for Raspberry Pi 4. Frame rates are expressed in frames per second (fps), and higher rates produce smoother video. If you want to create engaging content, such as gaming or video blogs, look for webcams that offer at least 30 fps. This ensures that movements are fluid and not jerky, which improves the overall viewing experience.
You might find that some lower-end models struggle with consistent frame rates, which can be frustrating during a live stream or video capture. Remember, it’s not just about how pretty the image is; it’s also about how well your webcam can handle movement – especially if you’re moving around a lot during your projects or presentations!
4. Field of View (FOV)
The field of view is the extent of the observable world that can be seen at any given moment through the webcam. This is particularly important if you plan to use your Raspberry Pi 4 for purposes like video conferencing, where you want to include multiple people in the shot or focus on a broader scene. A webcam with a wider FOV (like 90 degrees or more) helps you capture more without needing to reposition the camera constantly.
On the flip side, if your applications are much tighter and specific, like a close-up of your workstation, a narrower FOV might serve you better. It’s all about knowing your intended use, so think about what you’ll be filming or streaming and choose accordingly. A little foresight here can go a long way in enhancing your setup!
5. Microphone Quality
While a webcam’s primary function is to capture video, don’t overlook the importance of audio! A built-in microphone can save you from having to acquire another separate device, making your setup more compact. When considering the best webcams for Raspberry Pi 4, pay attention to microphone quality, ensuring it can pick up sound clearly without too much background noise.
Some webcams come equipped with noise-canceling technology, which can filter out ambient sounds and enhance voice clarity. This is particularly beneficial for online meetings or recordings where you want your voice to shine through. If your webcam doesn’t have great audio capabilities, it might be worth investing in an external microphone for an enhanced experience.
6. Ease of Use and Setup
No one enjoys the hassle of overly complicated setups, so ease of use is something to seriously consider when looking for the best webcams for Raspberry Pi 4. Look for models that offer plug-and-play functionality, which means you can simply connect the webcam to the Raspberry Pi without any complicated software installation. Also, check for any available software support or drivers needed for optimal performance.
Some users appreciate additional features, like software that allows for adjustments in settings or enhancements, which can be handy. However, if you’re not tech-savvy or simply want a straightforward experience, a reputation for user-friendliness will go a long way in making your life easier. A little research into user reviews can give you an idea of how seamless the setup is for each model, so don’t skip that step!
7. Price and Value
Finally, let’s talk about price. While it might be tempting to go for the cheapest webcam that catches your eye, it’s crucial to balance cost with quality and features. Remember, when you’re investing in one of the best webcams for Raspberry Pi 4, you’re not just buying a camera; you’re investing in a tool that could enhance your projects significantly. Thus, look for webcams that provide good value for money—consider the features you need and find a price point that fits your budget.
Moreover, take a shot at comparing prices across various retailers. Prices can vary greatly from one store to another, and you might find a fantastic deal or special offers that change your mind about a particular model. Sometimes, spending a bit more upfront will save you from having to upgrade later, which is always a smart move when aiming for longevity with your tech investments.
As you embark on your journey to find the best webcams for Raspberry Pi 4, keep these factors in mind, and you’ll be well on your way to making an informed decision. Happy webcam hunting!
Frequently Asked Questions
What should I look for in a webcam for my Raspberry Pi 4?
When selecting a webcam for your Raspberry Pi 4, you’ll want to consider a few key factors. First, think about the resolution. A higher resolution generally means better picture quality, so look for models that support at least 720p or 1080p if you want clear video. Additionally, compatibility is crucial. Ensure that the webcam you choose can work seamlessly with Raspberry Pi and supports the software you plan to use, be it for streaming or video conferencing.
Another important aspect is the frame rate. A higher frame rate results in smoother motion, which is particularly vital if you’re planning to use the webcam for gaming or video calls. Also, check the field of view (FOV); a wider FOV allows for more area to be captured, making it great for group calls or larger setups. Lastly, don’t overlook features like built-in microphones or low-light performance, as these can greatly enhance your user experience.
Can I use any USB webcam with my Raspberry Pi 4?
While many USB webcams should work with your Raspberry Pi 4, not all webcams are created equal. It’s essential to research specific models to ensure they are compatible with the Raspberry Pi OS you are using. Most common webcams will generally have support, but a few niche or high-end models may have limitations regarding drivers or functionality. Always check user reviews and feedback from the Raspberry Pi community to find trouble-free models.
If you’re unsure about a specific webcam, consider models that are widely recommended within the Raspberry Pi forums or tech blogs. These recommendations often highlight webcams that have been tested and confirmed to work well with the Raspberry Pi ecosystem, thereby reducing your risk of compatibility issues. Always keep an eye on details like driver support and installation ease when making your choice.
Is it necessary to install drivers for a webcam on Raspberry Pi?
Generally, most USB webcams are “plug and play,” meaning that they don’t require additional driver installations to work with your Raspberry Pi 4. The Raspberry Pi OS has built-in support for numerous models, which makes the setup straightforward and user-friendly. Just connect the webcam to one of the USB ports, and you should be able to access it through compatible applications without much hassle.
However, there could be exceptions. For specific advanced features, you may need to install additional drivers or software. It’s always a good idea to check the documentation of the webcam and any associated user forums for updates and guidance on using advanced features. This way, you’ll ensure everything runs smoothly right from the start!
What type of projects can I use a webcam for with my Raspberry Pi 4?
The possibilities are vast when it comes to projects involving a webcam and Raspberry Pi 4! You can build a home security system that captures and streams video or even a weather monitoring station that logs data to the internet. If you’re interested in robotics, integrating a webcam for visual feedback can be a fun way to enhance your robot’s capabilities. There are countless tutorials available to guide you through these processes, making it easy to dive into cool projects.
Additionally, webcams can be integral for video conferencing systems, whether for personal use or for virtual learning setups. Through open-source software, you can transform your Raspberry Pi into a powerful communication tool. There’s a vibrant community out there filled with inventive ideas and projects, so don’t hesitate to explore different avenues that pique your interest!
Do I need an external microphone for better sound quality?
While many webcams come with built-in microphones, the sound quality can sometimes fall short of expectations. If audio clarity is important for your project—say, for video calls or streaming—you might want to consider investing in an external microphone. External mics typically provide improved sound quality, reduce background noise, and can even offer options like directional audio, which captures sound more precisely from specific angles.
That said, before making any purchases, check the specifications of your chosen webcam. Some models do come equipped with decent microphones that may suit your needs just fine. If you find that the built-in microphone meets your requirements, that’s fantastic! However, should you need to enhance your audio experience, adding an external mic can be a worthwhile upgrade to achieve professional-level sound quality.
How do I troubleshoot a webcam that isn’t recognized by Raspberry Pi 4?
If your webcam isn’t being recognized by your Raspberry Pi 4, don’t panic—most issues can be resolved quite easily! First, check your connections to ensure the webcam is securely plugged into a functioning USB port. You might try connecting it to a different port or even rebooting your Raspberry Pi. Sometimes, a simple restart can get things up and running again!
If these steps don’t work, delve into the config files or run terminal commands to check for device listings. A community forum can be your best friend in these scenarios, as there’s often someone who has encountered and solved the same issue before. Remember, troubleshooting is a part of the process, so take it one step at a time, and you’ll likely find a solution that gets you back on track!
Are there specific brands of webcams recommended for Raspberry Pi 4?
Absolutely! While there are many brands that make compatible webcams, several stand out as favorites among Raspberry Pi enthusiasts. Logitech webcams, for instance, tend to receive high praise for their quality and ease of use. Models like the Logitech C920 and C270 are particularly well-regarded for their reliability and overall performance with Raspberry Pi systems. Another brand worth looking at is Microsoft, with its LifeCam series, also known for decent compatibility and video quality.
That being said, make sure to check user reviews and community feedback to get current insights on what works best. Recommendations can change as new products hit the market, so keeping an eye on recent experiences shared by others is always a good practice. Ultimately, the best choice often comes down to your specific needs and budget, so don’t hesitate to shop around!
Verdict
As we’ve explored together, finding the best webcams for Raspberry Pi 4 opens up a world of creative possibilities. Whether you’re diving into a home automation project, engaging in live streaming, or setting up a security system, the right webcam can enhance your experience and expand your capabilities. The options are plentiful, and with the right choice, you’re not just adding a device to your setup—you’re investing in countless hours of enjoyment and productivity.
So, take the leap and choose the webcam that resonates with your needs and aspirations. Remember, every big project starts with a single step, and with the right tools at your disposal, you have the potential to create something amazing. Get ready to unleash your creativity and innovation with your Raspberry Pi 4. The best webcams for Raspberry Pi 4 are just a decision away, and your next great adventure is waiting for you!